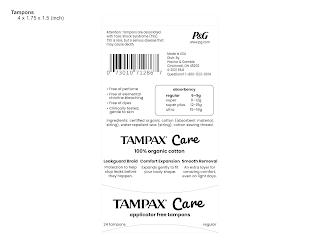
I presented my paper prototype to the class for feedback and decided to move the top down to the front side so on a shelf the tampons would't be sitting sideways.
While in class, I went up to the fab lab to get a scrap of the the single ply cardboard which I think is actually just a heavy weight brown cardstock... I wanted to see how the substrate would fold and how much clearance I should leave for the text. I first folded without scoring and got some wrinkles and cracks so the next fold I scored with the top of my lack-of-eraser lead pencil and it looked much better. I make a little sleeve like my tampon box would be.
_________________________________________________________________
After working out the text layout I worked on the line texture. I kept the same weight as the Care text to help tie that in better as the font I chose is a little heavy in visual weight compared to everything else. It took lots of clipping mask and selection tool deletes but I finally worked out a layout. I'm going email it to Professor Mata now for some more feedback and print out dielines tomorrow to double check the specs before I go to do the final print.
_________________________________________________________________
Your designs look very professional. I can’t wait to see them engraved. If you have problems or issues with the engraving don’t freak out! I would rather see you try and fail than not try at all.
Just a few things to look at…
- Make the barcode smaller on the pads.
- For all make the Ingredients italic. (unless it won’t engrave)
- Menstrual cup: on the Made by Women side, look at the edge tension of the body copy.
Professor Mata
I printed out my dielines with my work to check more of the edge tension and orientation. I bumped a few more text items in on the cup package and I flipped around the bullet point list panel on the tampons as it was was upside down. I also realized I missed adding the line art to the sides of the underwear box, so I fixed that as well.
I've been in communication with the fabrication lab tech, Zach, to get more information on how engraving works. One point he shared with me is that I need to make sure that no lines are overlapping and that everything is ungrouped. Because of my clipping masks I had many groups with the lines and even the barcodes.
I began brainstorming of how I can cookie-cutter cut out the shapes. I started with releasing the masks and placing the shapes ontop to divide and then delete everything that was cut and on the outside of the shape. Then my friend and classmate Hannah O'Steen shared with me a tutorial she found using the clip tool in pathfinder and I was able to quickly delete everything on the outside of the clipping mask and then ungroup the lines.


No comments:
Post a Comment